Thursday, December 20, 2012

Dad "documented"


I've been thinking of my dad lately.

I had always admired the photos that "big name" scrappers had taken of dads walking with sons, especially from behind. It's like a special moment of intimacy that is so fleeting...

When I saw the opportunity to take this picture of my dad and my son walking together, I am sure I looked ridiculous running for the camera and stalking them like a mamarazzi.  But I had to get this picture.

You see, a month before this was taken, my dad had a brain surgery to remove a cancerous tumor. This is one of the few times he actually got up from the couch to do anything, as he spent most of his time trying to recover. When I thought to take this picture, the thought "I may never get this chance again" crossed my mind.

I'm glad I got this picture... dad passed away the following July.
Still missing you Dad.

(this is a used my stash page!)

Tuesday, December 18, 2012

Good morning! It's my turn to post a project on the Cricut FANatics blog!

I love looking at quilts, and wish I had the patience for quilting myself. I've also seen a few scrapbookers use quilts as an inspiration for their pages. That that is where I too decided to look for inspiration!

 The bottom half of this layout is made with quite a few "squares" pieced together to look like a quilt. I cut half of them from a blue patterned printed paper and the other half of them from an off-white pattered paper. The "squares" are not true squares at all. The edges curve slightly inward. The shape is button 14 on CTMH Art Philosophy. The edges are inked to give them more depth. Behind these squares is red cardstock, to give the shapes a contrasting background.

The flowers come from Flower Shoppe; the words "oh" welded from Songbird, "Happy" from Cake Basics, and "day" from Graphically Speaking. Oh and the blue scallop border is also from Art Philosophy! I just cut two at an inch so that the two would equal 12".

I will say, getting the "squares" lined up like this was painstaking work at first. Repositionable adhesive tape really helped! But I think the result was worth it. I won't be able to cover the all that "quilting" with pictures, that's for sure!

Cricut Info and other supplies used:
Designed by Michele Donner-Ramsey

Cricut machines:  Expression and Gypsy
Cartridges used:  Cake Basics, Art Philosophy, Songbird, Graphically Speaking, Flower Shoppe
Supplies: Off-white and red colored cardstock, Printed cardstock, buttons, ink, adhesive

Sunday, December 16, 2012

Children of the World Swap

On the Cricut Circle message board, one of the members, "RockinRenee" hosted a swap using the Children of the World cartridge.  There were 25 "children" on the cartridge, so as many ladies as were willing volunteered to make the children of their choice to fill all the slots. We each made 25 of the children, and sent them to Renee, who sorted them and sent us back one of each different child!

Naturally, having been a belly dancer, I wanted to make a child from one of the countries from which my favorite dance form originated. ;)

I forgot to take pictures in the early stages of construction, but I found it easiest to work in an assembly line fashion. I inked edges of all the donkey pieces and most of the Arabic girl's pieces first, then assembled.


At the end, after all was assembled, I added the final details with a fine tip gold paint pen, to put the gold "coin" decoration on her hijab and hem of her dress.

Best of all,  I did this project with stuff from my stash!


Would you like to see all the other Children? :)  RockinRenee took some great pictures of each one and posted on her blog: I came, I saw, I created so go check it out!!! They are all AWESOME!

Thanks for stopping by!

Sunday, December 9, 2012

the patch


Hello all!

Here's another Use Your Stash! layout. I used the last couple sheets from a cute line of papers I had... my favorite of that line was the bluish wood grain. Love it! Almost wished I had more! :)  These are pumpkin patch pictures from this year... I still have a few years I haven't scrapped yet so don't get to thinking I'm "caught up" cuz that will never happen. LOL

Anyway, kept it simple to get it done. Not awesome but that's okay.

Thanks for stopping by!

Monday, December 3, 2012

Explore

Hello all! 

Here's another "Use Your Stash" layout. This time I used some Kaiser paper with owls on it, you know, back from a few years back when owls were all the rage. :)  But after I laid down the background papers, only one tiny owl face was actually peaking out from behind a photo. LOL...

So I used the remainders of the papers to try to fussy cut a few more owls... and one of the papers had some strips and tags, so I cut the tags out too, and they had owls... Then I found a WRM tag with an owl... and of course a Charlene's Button in the shape of an owl. I did like the owl craze, but yeah, they were everywhere. Anyway, this layout finished out these papers so that was good. (and no cricut!)

I was pleasantly surprised with these pictures, which the hubby took. Though he likes to take pictures, he doesn't often go to the trouble to work on composition or anything. These turned out awesome though.

Thanks for stopping by!

Saturday, December 1, 2012

Remember


Here's another layout I completed recently. This is another "Use your stash" layout! This is all old stash too! I am using more Kaiser papers, and a package of flowers, the word sticker and a postcard embellishment.

In 2007, my aunt passed away at the same time I was planning a trip to visit my mom, who hadn't seen my son since he was a little baby. I still went, as I knew mom would need help sorting through Aunt D's stuff. But I didn't take many pictures, as it was a sad time and we didn't get to do much fun stuff... in fact, these are all I took. 

The little dimensional paper flowers are from K&CO, but they were originally off-white. They wouldn't have looked right on this layout since the printed papers have true white in them. So I misted the flowers with yellow mist while they were still on their sticker packaging, and then used some puffy white vinyl flourish stickers I got at Joann's. I rather like how they all turned out. And yes, there is a Charlene's button (the dragonfly, for those making sure I do my Charlene's button challenge). :)

Again, NO CRICUT cuts! lol

Thursday, November 29, 2012

Wolf Birthday

November 1 is my son's birthday, and he requested a wolf-themed party! You can see my post about the invitations and the animal masks I made for the party HERE.

Here is the main layout for the birthday party. On the back side of the right page are some more pictures and a blessing card from when I had my baby shower (all the attendees wrote a blessing for us to pull one on each birthday). There will also be a few of the page protectors that just hold photos to store the rest of the pics in. I took a sampling of the party pics for this page.

I'm also on a spending freeze, so all my scrapping is to be with stuff in my stash, and this is no exception! I did this layout at a crop where I decided not to take my cricut in with me, forcing me to use only embellishments and letter stickers from my stash! I hand cut those banners! The printed papers are Dream Street... I really loved the woodgrain one, wish I had more of that! And yes, for those following my Charlene's Button challenge... I used two Button Box buttons! (the woodgrain "photo" corners)

Monday, November 19, 2012

Winter Holiday Cards

So, I've been trying to make our winter holiday cards for the last few years. I try to make a "simple" design in the hopes I get them done quick, but gluing these together took a while so they weren't as simple as I'd wanted. lol

This year I also wanted to stick to using only my stash, which meant that I had to find enough cardstock of each color to make the cut top layer, and another layer for one of the mats. Fortunately, I found enough cool blues and purples to make these. A few of these colors may be non-traditional but hey... I managed to not buy a thing! :)  I still need to do something with the insides, probably a stamped sentiment. But at least I got 40 of these done and I can finish up the stamping this weekend.

These cards were created by welding snowflakes and a sentiment from several cartridges into a rectangle frame that I sized to fit a card that would fit into a regular size #10 business envelope. See below for the cartridges used!

Cricut Info and other supplies used:
Designed by Michele Donner-Ramsey

Cricut machines:  Expression and Gypsy
Cartridges used:  A Child's Year, Cake Basics, Christmas, Country Life (Sentiment), Art Philosophy, Joys of the Season, MS Seasonal Cake Art, Plantin
Supplies: white and colored cardstock, adhesive


Monday, November 12, 2012

Violet Jelly!

Greetings everyone! :)

Here is another "use your stash" layout that I finished at a crop this past Saturday. I'm very pleased with how this turned out!

I have had these lovely Kaiser Craft papers in my stash forever. Kaiser is one of my favorite paper manufacturers, and for the longest time I've hoarded my stash of their stuff. NO MORE! I will be using it up! LOL

This this last spring I put my mind to learning how to make violet jelly. In past years it seemed we just didn't have enough violets growing in the yard, but my very careful attention to letting weeds grow rampant and unchecked in our yard gave us an abundant crop of violets this year. :)  So my son and I hit the grass to collect as many violets as we could!

I took pictures of every step of violet jelly-making - it was super fun and easy (as any jelly-making process can be called "easy").  But that meant I had more pictures than space on two 12x12 pages... so I used the die cut shape in the middle... with one half of it being a flap, that pictures are visible only when the flap is lifted. See below!

You can see in the center the green side of the die cut had hidden 4 more pictures.

I used lots of cricut cuts on these pages. The title uses the font from the newest Cricut Circle cartridge, "Something to Remember". The violets are from 50 States! an oldie but goodie cartridge. :)

The title and it's shadow was welded on my gypsy. The violets, 3 different forms of them, were cut in two different shades of violet cardstock as well as green for the leaf layer. The two different violet colors allowed me to trim and make my own extra layer on a couple of the flowers for two-toned violets. I also used a white gel pen and some other pens to do some coloring in the flower centers. I used my photos of the violets we picked as a guide to making my paper violets more realistic looking.

I also used a couple Charlene's Button Box buttons, a green square one became a flower pot, and a cute little purple butterfly.

Thanks for stopping by!


Sunday, November 4, 2012

Burlesque le Mustache!

Hello everyone!
So! My hubby and I have been saying to each other for a few years that we wanted to go see a burlesque show put on by a local troupe. But we never got around to it! Then, a good friend of mine joined the troupe and we KNEW we had to go see her first performance! It was so fun! Not raunchy at all, as we never really saw more than you'd see on some commercials! :P  Now, we weren't allowed to take pictures but the owner of the troupe had posted some rehearsal pics and I snatched them off the 'net. :) 

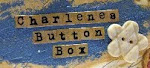
The funny thing was that I had this collection of scrapbook product from Glitz Design French Kiss line. I'd won the ENTIRE collection from a raffle back in March! (the link goes to their site with all the collection). When I'd won it, there was this mini-book set of pages that had the above cover and I knew I'd have to save for when I finally got to go see a burlesque.

So, I made this mini-book with the product from this line that I had in my stash since March. It was perfect for this project. I had lots of pages to work with, so I was even able to leave two pages picture-free for a couple pictures I knew were out there but that I couldn't nab and print.

 The pictures center around my friend whose performance name is Nixie Hex. ;)  Can you believe this beautiful woman is the mother of 7!?

Everything used in this book was from my stash, starting with the product that I won, which included 12x12 papers, the 6x6 paper pad, epoxy stickers, glitzer stickers, giant rhinestones, journaling stickers, layered stickers, ephemera, stamps and title stickers!

 I also used other things from my stash, including ribbons and bling.

 I nabbed some awesome pictures, even if they weren't at the actual show... rehearsal was good enough!

 But I did get some pictures myself after the show! I took one of me with my friend as well as some other mutual friends with her. I centered this mini-book around my friend because I intended to give it to her as a momento of her first burlesque, which I did last friday. :)

In addition to making this book, which used a lot of the collection that I had, I also made the scrapbook layout for my own scrapbook, finishing out the bulk of what I had. I had too many pictures for a 2 page layout, so I had two half pages as well, that went between the pages in my book.

So, another USE MY STASH project... or projects! done!

Thanks for stopping by!

Sunday, October 28, 2012

Birthday time!

My son's birthday is November 1st. :)  We're having his birthday party today! Since we're having it at a pizza place, I did not make a huge pile of decorations or anything, but I did make the invites and some masks for the kids. My son chose a hard theme to decorate for... and I was lazy. LOL

Here are the invites:
My son wanted a wolf theme for the party. There's a story here:  When I was pregnant, two of my good friends were also pregnant. We were talking names one day and one of them said "if it's a boy, we're naming him Aidan Wolf" and the other friend said, "What a coincidence, we're naming ours Frederick Wolfgang".  So I said, "wait a minute! I want in on that! I'll put wolf somewhere in my son's name!"  So we all did! Kevin James Wolff is part of the wolf pack of boys born in 2006. ;)  Anyway, my son thinks it's cool and wanted a wolf themed party.  He told me the imagery he wanted as part of the theme and I made the invites accordingly! The card base is from Cricut Wild Cards and the wolf portion is from Pumpkin Carvings. :)

I also made the kids some masks to wear.

I made two each of all the masks, the cats are the only ones that are different from each other though. These were made from the Cricut digital image set Animal Masks.

And guess what! Everything was made using my stash. :)

Saturday, October 27, 2012

Flower Spray Swap


Hello everyone!
In September, I participated in my first online swap, on the Cricut Circle messageboard.  We all made flower sprays! The picture above is mine, I made flowers from paper using a rolled spiral flower that I cut with my Gypsy and Cricut, then using wire and beads, I attached them all together. They were very easy but after making so many of them, my fingertips were SORE! lol

In the process of making my sprays.


Here's what the other ladies made!  (my photos do not do justice to how beautiful these are!)

Our hostess, AmyS, made this one. Her Website


 This one is by BulldogMommy. Go to her website

 This lovely spray is by FredaC and here is her blog

 This is by GrannyAnne and here's her website

 I love these colors. By Scrapperbecka CreationsWithBecka

 By KauaiMelody at her blog CricutMelody

By Erika: her website here

Thanks for stopping by!

Thursday, October 25, 2012

What Happens at the Crop...


...Stays at the Crop!!

This is a USE YOUR STASH layout I did with pictures from Scrapaganza's last Favorite Things crop, the summer of 2011. Our theme for the crop was a Las Vegas style theme, including tshirts we had made that said What Happens at the Crop, Stays at the Crop. One of my co-workers, her hubby dressed up as nightclub Elvis, we had lots of fun games and a costume contest.

In August, Cricut Circle members had access to all the digital cricut image sets, and I made as many cuts as I had time to make for pictures I knew I'd want to scrap. At that time, I knew I would be scrapbooking these pictures, so I used the Las Vegas digital image set to cut the dice and the Las Vegas sign.


The diamond background in red was cut using Artiste, and I welded 4 of the diamond backgrounds together to make the background for this layout. I wanted something evocative of playing cards but didn't want to spend the time welding one image at a time... then I found this diamond background on Artiste.

Everything is from my stash, from the scraps I cut everything from, to the ribbon, papers and Charlene's Button Box buttons! :) 

Thanks for stopping by!

Wednesday, October 24, 2012

This Boy

USE YOUR STASH! :)

Here's another layout I did at the Lorado Scrapbook retreat. Again, I used my stash! The only new thing on this layout is the mask I used to mist spray the background... it is a Studio Calico "Mr Huey's" mask that I bought at Lorado. I forgive myself for buying it because it helps me use up the HUGE stash of mists that I have! I think tools that can be used over and over don't count, right?  lol  Everything else was in my stash though.  The rub on that I used for the title has been in my stash since October of 2008! When I first started scrappin', and I bought it at a scrapbook garage sale! lol

up close and personal
The blue pointy circle in the background is from my cricut, the cartridge is Art Philosophy. :) The red star button is from Charlene's Button Box.

Thanks for stopping by!

Tuesday, October 23, 2012

Storm Chaser

USE YOUR STASH!  :)

This is a "use your stash" layout. I pulled out some old Kaiser Craft "Marakech" paper that I had in my stash (I have LOTS of Kaiser paper in my stash... topped only by G45). The paper is so old I couldn't find it listed on their website anymore lol.  I also had some 7Gypsies gaffer tape (which I like better than that washitape that's all the rage).  I used the cricut to cut the sign outline (Street Sign), the cloud (Pop-up Neighborhood) and the lightning bolt (October 31st).  The cloud is embossed and then I stickled the embossed pattern with Distress stickles in a grey color (can't remember what color that was). The title is from some OLD thickers from my stash. I bought probably 4 packages of those black thickers before I got my cricut.... LOL... I've been trying to use them up!
a little close up of the cloud
Our local museum has the movie "Tornado Alley" playing right now, and this Tornado Intercept Vehicle is featured in that movie. Our son was pretty in awe of getting to see the TIV in person! I am impressed by the ingenuity of it's builder.

Thanks for stopping by!

Saturday, October 20, 2012

Lorado/Taft Scrapbook Retreat

Since October 2011, I've been going to a scrapbook retreat at a state park in Illinois in the spring and fall. It goes from Friday afternoon to Sunday afternoon, and it's the best, funnest, most relaxing crop I've ever been to! I would have to be on my deathbed to not go to the future crops!

So I thought I'd share a few pictures of this year's crop. :)
Here's me, at my scrap table. The view out the window behind me is pretty much what the whole site looks like. :)
a froggy friend outside our scrap room. We also saw turkeys and other wildlife. No bears though. ;)
These are my scrappin' ninjas. :)  We like to go to crops together! We are standing next to the building that was our dorm and our scraproom.
There are several building, and one might be scrapping in one building, and sleeping in another. It all depended on how far you were from the dining hall. Our building was farthest from the dining hall, so our sleeping and scrapping were in the same building. The meals are provided by the Taft staff, and are wonderful!
there were a few scrappy contests, and my friend Katie won best name tag - a crown of course!
Someone made crown cookies with our names on them, one for each person in our scrap room!
Lots of shenanigans went down in our scrap room... and I can't post most of the pictures or I might discover some nasty pranks in my scrap gear... so this is all you get. ;)
I used my iphone to take a panoramic shot of our scrap room. We had 14 ladies in this room total! There were 70+ at the crop.
My sweet hubby schlepped all my stuff in from the car while I watched from the couch.
I slept a total of 2.5 hours Friday night. That was IT for the whole weekend! I pulled an all-nighter on Saturday. I barely made it home... I think the only reason I did make it home is that we all drove home through a storm, and I SWEAR I drove under a funnel cloud on the way... so half my drive was adrenalin and fear keeping me awake!  Next time, if I want to pull an all-nighter, it will be on friday night... I have decided that I need at least 4 hours sleep the night before driving home!

Oh, and did I get anything done? why yes, yes I did. :)  Here's a sneak peek... you'll see more of this stuff in future posts!
Thanks for stopping by to visit!

Thursday, October 18, 2012

Nuts About You


Hello all! Today was my turn to share a project on the Cricut FANatics Blog! This is the project I have posted there. If you haven't been by that blog, you really should go! It's a WEALTH of project ideas and inspiration!!!

I have a few friends that have asked me to create kits for them, and this is one that I finished up not too long ago. I really like how this one turned out.

I loved the title, but I worried that the words might get lost on the busy background paper, and there was no shadow option for it. But, you don't always have to use a shadow of the shape, all you need is something to set it off... and I thought two acorns welded together as a background for the title was perfect. In fact, I liked it more because it was different from the usual phrase shadow.

"Cutesy" pages like this can seem more "grown up" after inking the edges of everything with dark brown ink. I found this out when one friend, who'd seen these pages in their initial stages before ink, and then saw it later when it was completely done... She didn't want a kit at first, it was too cutesy for her. But the inking changed her mind completely.

The ribbon is seam binding that I had dyed using Distress Stain in Fired Brick color. I laid down a strip of tacky tape adhesive, then as I laid down the ribbon, I pinched pleats in it. This gives the layout texture and dimension, more than even pop dots can! 


Thanks for stopping by!

Monday, October 8, 2012

Fall Blog Hop prize Winner!

Oh my gosh that is super cute!! That would be a fun project to do with my girls or students too. I like that you used purple with the orange. :)

Congratulations Crafty Teacher! as soon as I get your mailing address, I'll send out these stamps I have for you!