Hello my wonderful readers!
Have I mentioned lately how I love my Gypsy? I don't know how I lived without it, and I know I'd be a terrible DT member if I didn't have it, since I design everything on break at work... I'd never have time if I had to wait for my son to go to bed first. LOL
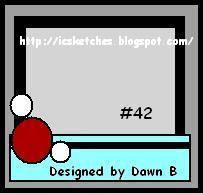
So lookie lookie! This card is for the new sketch over at Inspirational Card Sketches! Did you ever put candles (or fake candles) in the windows during the holidays to light your loved ones on their way home? I remember we did that, even though we really didn't have family far away, it was sort of symbolic, how you wanted everyone in the world to make their way home for the holidays.
I think I may send this to a soldier overseas for the holidays. To let someone know that we're burning a light for them to find their way home, whenever that may be.
I had done another card with this window pane motif, my Cardinal at the Window card. Well I love the windows. And I've had a few people ask me how I did it, so I thought I'd do a tutorial since I finally figured out that my camera can take close-ups. *rolling eyes* Yeah... I'm lame... after 3 years I finally figured out how to do it.
For this card I used leftovers of Basic Grey holiday papers from last year. I don't even remember which line they are from, they were tossed in my scrap box. Of course there's a ribbon, and I used my Martha Stewart branch punch again (lovin' it!). The cartridges used are Wild Card (panes, candles), Gypsy Wanderings (window shape, background behind window, window box) and Plantin (scallop border). But even if you don't have those carts, if you have Design Studio or the gypsy, you can create these windows or find peices that would work on other carts.
I'm not going to be super specific, since it's up to you what you want your window to look like and what is behind it. I'll just tell you the steps I use.
First, I never break out new papers for cards. I only use scraps. And since I have the gypsy, I can place my cuts right where I want them and put as many papers as I can on a mat and spend less time changing mats.

After cutting all the elements for the card, I assemble the window. The foreground of the window consists of the window frame, the pane, and a peice of acrylic packaging cut down to size (I use the plastic packaging my carts come in).
I first glue the panes to the back of the window frame.

Then I glue the plastic "window glass" to the back of that.

Then I assemble the background of the window, in this case a "dark room" and the lit candles. and add pop dots around the edge.
And then add the front of the window. The pop dots give the illusion of depth.
Put together your card with whatever embellishments you want, and you have a lovely window card!

The Cardinal at the window card from several weeks ago:

Thanks for looking and following along!


Wow these are amazing.
ReplyDeleteSo wonderful cards. Love them.
holy moly!!!! is this gorgeous or what???? and thank you sooooooo much for showing how it's done!
ReplyDeletehugs,
absolutely stunning card!! seriously, these are really fab, what a great idea!
ReplyDeleteThis is TERRIFIC!!! I love the window...what a GREAT idea!!! I am racking my brain right now trying to think of what I can use for the window pane since I dont have Wild Card...do you have any ideas???
ReplyDeletethanks for sharing your talent,
Sarah
the christmas solutions cartridge has a fancy window with panes. that cart also has shadow and blackout for that shape. :)
ReplyDeleteThis card is so gorgeous. I am going to have to play with my Cricut and follow your directions to see if I can't create something remotely close.
ReplyDeleteThanks for sharing the how-to.
WOW! Absolutely BEAUTIFUL cards!!! I just LOVE them :-)
ReplyDeleteThe two window pane cards are great. Thanks for sharing your creativity.
ReplyDeleteHi Michelle,
ReplyDeletethank you so much for coming by my blog and answering my question! I do not have Christmas solutions =(
I thought I saw a window on Home Decor, but I was checking it out on my Gypsy last night and didnt see it.
I was thinking I could use the Gypsy and weld a bunch of skinny rectangles together criss crossed...it would be alot of work, but it might work!!! Gypsy life is so much fun, crazy but fun...
thanks again,
Sarah
What a lovely and traditional card and thanks for showing how it is done! Take care Sal xx
ReplyDeleteWOW this is FAB and all the layers are very cleverly made. Lucky you having a gypsy . . . I just wish !
ReplyDeleteLou
x
GORGEOUS and brilliant and I can't wait to give it a try!!! You are so talented!
ReplyDeleteGorgeous...I love it...I can so see a scraplift for a layout...love love love it...so very creative!!!!!
ReplyDeleteMichele,
ReplyDeleteThanks again for the tutorial. I tried it myself for the first time. My card isn't nearly as beautiful as yours are, but I don't think it is too bad for a first try.
Michelle
Wow! This is just stunning. Love the scene you have created. It's beginning to look a lot like Christmas.
ReplyDelete