Showing posts with label Scrappinista. Show all posts

Thursday, January 26, 2012

October 2011 SSC (the LAST SSC!)

Scrapaganza closed it's doors at the end of November. The October Scrappinista  Scrapbook Club was the last kit I got to design for. I have to say, that after designing for that club, I didn't have the heart to scrapbook for the rest of 2011. All of us staff at Scrapaganza were quite sad to leave.

But our last kit was made of Jillibean joy! I just love Jillibean, and if I had lots of money, I'd buy every one of their collections! The above layout was inspired by one that I saw in Scrapbook Trends. Unfortunately, I can't find it now to say who it was that inspired me. :(  My mother-in-law took my son to Incredible Pizza and did the photo booth there, and gave me a copy of the photo sheet. It had those tiny photos along the end of the sheet of wallet sized ones, and I knew I had to use them somehow!

As a designer, one of my jobs was to show customers how to use the product we sold, and that included "theme stickers". Many people avoid theme stickers when they start to follow scrapping trends, myself included. But when I saw these "Phineas and Ferb" cartoon stickers, I HAD to use them! You see, it's one of my son's (and mine) favorite cartoons, and my son's imagination reminds me of Phineas. So I took the cartoon's theme song and re-wrote it somewhat to fit the photos and used it as journaling with the photos that highlight some of my son's more imaginative summer activities.

My friend Sherry's last visit to crop at the store before returning to her out-of-country home. This is a bittersweet layout, as we'd both been crying just before this photo was taken, and not just because she was leaving. We had both lost a loved one to cancer as well.

This is my "use what is left" layout. :)  Not very exciting but I don't like having lots of leftovers from a kit that I have to store. So I try to use it up!

However, I still had scraps left, and lots of them. So I did this little 4 page mini book with some leftover mini book pages from another project. Sorry I don't have interior pics. It was made to mostly demonstrate that you can use up a kit's scraps. ;)

Thanks for stopping by!

Thursday, November 3, 2011

Catching up again! September SSC


I am sooo bummed that Scrapaganza is closing. I had a hard time posting my creations that I made for the store on my blog because of that. Working there kept me so busy creating that I didn't keep up my posts here, then I was too bummed the store was closing that I didn't post. :(  Well, now perhaps I will post more often. We will see! I have to stay creative! I have another job to replace my beloved job at Scrapaganza, but it's not the same.

Here are the pages I created for Scrapaganza's Scrappinista Scrapbook Club kit in September. The papers are all from Kaiser. The first one is Venus Envy, pictures from when my belly dance troupes performed at our local Venus Envy show a few years back. :) I tried out one of those new EK dimensional flower punches... I used it as a border as well as for making one of the flowers. I love that punch!

A picture of my lovely attendants at my wedding! I tried out another new punch, the Anywhere on the Page punch called "Caning".  I like how it looks on this, somewhat exotic. It's not an easy punch to use though, because of the repeating pattern and how intricate it is. But if you are patient and take your time, it looks fantastic!

My friend Penny took this picture of my son at the scrapbook store, and I just love the picture. :)

The 'leftovers' layout... trying to use up my scraps. ;)  My son is only 2 here (he just turned 5!) but he still has a fascination with pianos. I used the Epiphany Crafts punch and epoxies on the little baubles going down the left side.

Thanks for stopping by!

Wednesday, September 7, 2011

Havin A Blast layout

Fourth of July, 2010!  We spent the day at a friend's house, barbecuing and fireworks.

So this is the last layout I did with the July Scrappinista Scrapbook club kit for Scrapaganza. It was really fun to work with that kit. I loved the colors... I know, they were July 4th colors, but still, I've seen papers I didn't like for this theme! :)

I used my i-Top punches to punch shapes for the "flowers", which also could represent fireworks if you don't like flowers on a boy page. ;)  Anyway, good way to use specialized punches in a new way!

Thanks for taking a peek!

Tuesday, September 6, 2011

Boot Camp layout

Yep, me again, this time I'm in the Air Force boot camp in 1984.  Yikes!

Another layout using the July Scrappinista Scrapbook Club papers, American Made by My Mind's Eye. I used a sketch from one of Scrapbook Generation's sketch books, which Scrapaganza carries. Love these sketch books! This particular sketch is awesome in that you can get a taste of several different printed papers without using up a lot of them.

I also pulled in some Air Force stickers that Scrapaganza had in stock, and that really filled out the page the way I wanted.

Thanks for stopping by!

Monday, September 5, 2011

1776 1976

Yep, that's me, dressed as a pilgrim for the 1976 July 4th parade. I was in girl scouts and that was our troop walking in the parade.

This is another layout using the MME American Made collection for the July Scrappinista Scrapbook club at Scrapaganza (wow that is a mouthful). Some of the papers in the layout are practically done pages before you even start! I added another layer of paper, then my pictures, and then a few embellishments and it was done.

Thanks for looking!

Sunday, September 4, 2011

American Made Boy

Hello all! Long time no see... yeah. I'm naughty. But feeling like blogging so here we go!

This layout, American Made Boy, was created with My Mind's Eye, American Made collection! I love working with MME papers, such great quality cardstock and designs are always awesome. This collection was used for the Scrappinista Scrapbook Club for July at Scrapaganza!

I also used the Daisy Wheel punch from Martha Stewart EK large border punches. I punched the top layer then glued that down to another printed paper and trimmed around the edges, which gives a bunting effect, I thought. Finished the bunting off with a little ribbon.

The star in the background was made using Jenni Bowlin banner stamps on scrap white paper, cutting out the banners and putting them together to make the star. easy peasy. :)

Buttons are from Charlene's Button Box!

Thanks for stopping by!

Sunday, July 10, 2011

June Scrappinista Scrapbook Club!

June's Scrappinista Scrapbook Club for Scrapaganza is October Afternoon's 5 & Dime Collection!
What an awesome paper line to work with! I loved it, even though I wasn't sure I wanted another "vintagey" line to work with. This one was awesome!

I wasn't sure I'd like this layout but once I was done, I loved it.

I used Distress stain to wash the title background, using the word "mom" as a mask.

October Afternoon's chalk Sprinklers spray was AWESOME to work with!

Thanks for looking!

Friday, July 8, 2011

Catching up! May Scrappinista Scrapbook Club!

Scrapaganza's May Scrappinista Club kit was BoBunny's Ad Lib collection! What an awesome funky fun line of papers to work with!

The only problem is that I ended up in the hospital on the day I planned to finish using up my kit! Just a bout (first one) of gall stones, so I'm okay. But it was a few days before my vacation to Oklahoma so there just wasn't time for me to do more than these two layouts.

Thanks for stopping by!

Wednesday, July 6, 2011

Catching up! April Scrappinista Scrapbook Club!

Now for April's Scrappinista Scrapbook Club at Scrapaganza!  This month's adorable papers came from the Neighborhood Collection from Crate Paper! I just loved all of these papers, especially the bees!
The papers really inspired me.
Normally I'm not a big fan of Crate Paper, but I loved the color scheme of this line!
I use paper behind both this layout and the "you are my sunshine" layout above. This one I used a piercer to poke the holes for the butterfly's flight path, and I adhered paper behind those holes to show through. 

Thank you for stopping by!

Monday, July 4, 2011

Catching up! March Scrappinista Scrapbook Club

Hello!  March's Scrappinista Scrapbook Club kit at Scrapaganza was Cosmo Cricket's Circa 1934 collection! This line of papers and embellishments were sooo lovely to work with! But then my favorite colors have always been black, red and white... but an added surprise of yellow took this kit to a whole new level.

The collection lent itself well to cutting up the papers, something I always loved doing!
This page was inspired by Amy Heller on Two Peas.
A little card I did with the scraps.

Thanks for looking!

Saturday, March 5, 2011

Feb Scrappinista #5 - Use the scraps!

I am a HUGE fan of using up the scraps. When I get finished making layouts for the Scrappinista Scrapbook Club kit, I always try to find a little time to use up some of the leftovers somehow.
This kit had some fabulous stickers on the sticker sheet. It was very easy to use them on a few cards!

Here I used some of my leftover border rub-ons and ribbon. I just rubbed the rub-on right onto the ribbon, it transfers like a dream!

Instead of adding scraps to your stash, USE THEM UP!

Thanks for stopping by!

Friday, March 4, 2011

Feb Scrappinista #4 - Love

Not a whiff of pink anywhere! :)
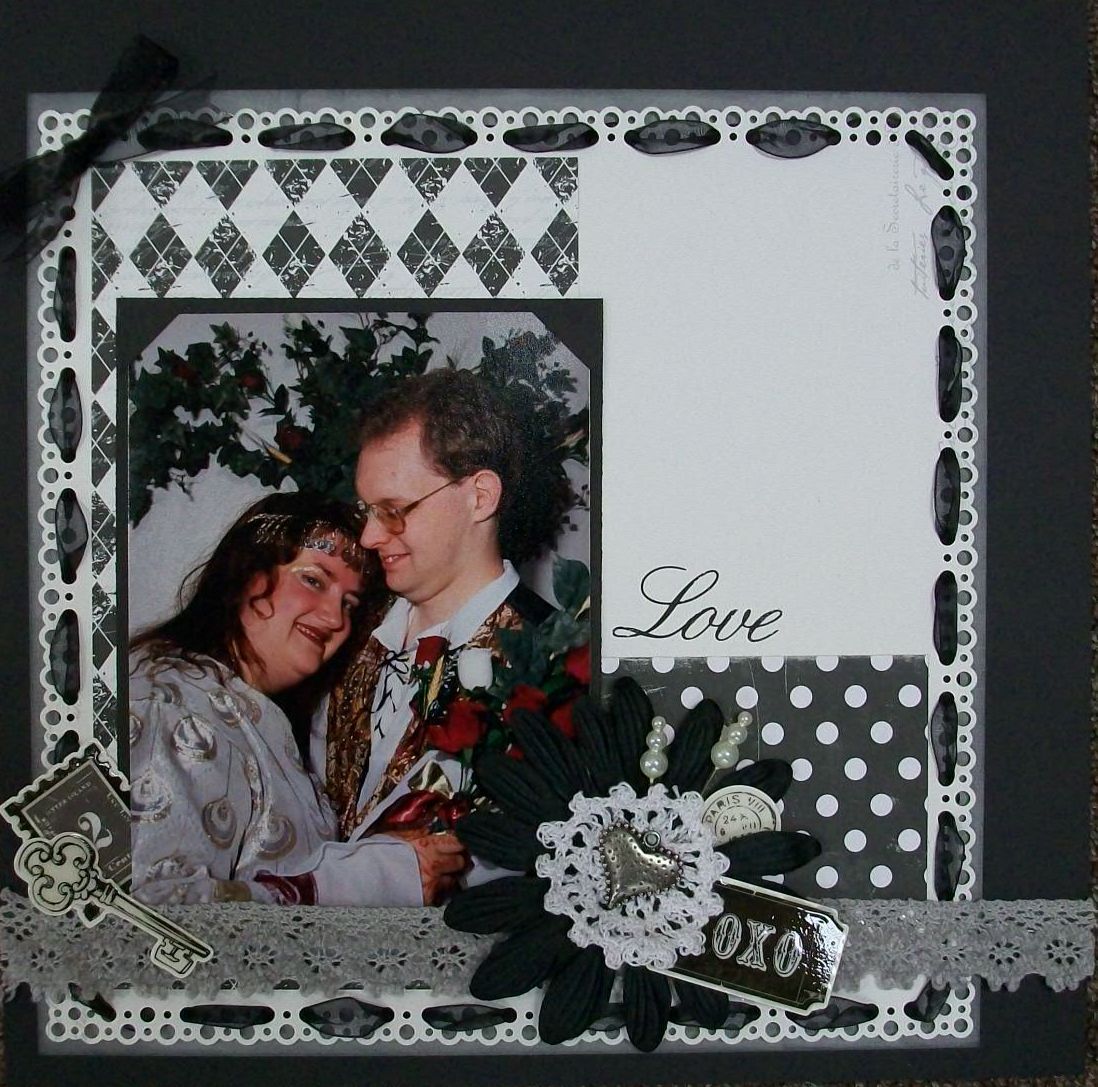
This is still the same Scrappinista Scrapbook Club kit from Scrapaganza we got in February. I just didn't use any of the pink stuff. The white paper is actually a chunk that I cut out of the pink frame I used in my 1 year layout. I used my new Bubbles punch-around-the-page punch on it, then wove some black organza ribbon through the holes. Scraps left from the other pages were layered and then I added some stuff from my stash. There are 4 stickers from the kit that I covered with Glossy Accents and allowed to dry, which gives the stickers a whole new look. I really liked this page!

Thanks for stopping by!

Thursday, March 3, 2011

Feb Scrappinista #3 - Kevin

Yep, nothing wrong with pink in a boy layout!
More scrappy goodness from Scrapaganza's Scrappinista Scrapbook Club kit from February. I used the paper in the Echo Park Be Mine line that says "so in love with you" in the corner. Instant title! Some simple paper layering, a little bit of rub-ons under some Tim Holtz fragments, a few stickers and I'm done. ;)

Thanks for stopping by!

Wednesday, March 2, 2011

Feb Scrappinista #2 - 1 Year

That's me, at 1 year old! LOL... This is the second layout I created with the Scrapaganza Scrappinista Scrapbook Club kit, Echo Park's Be Mine line. In addition to the papers, I also used rub-ons from Kaiser and one of Charlene's Button Box buttons.  It's a simple layout but I love what the rub-ons do for it.

Thanks for stopping by!

Tuesday, March 1, 2011

Catching up! (Feb Scrappinista #1)

Wow friends! I just realized how long I've gone without posting. All I can say is that I had a lot of personal stuff going on in February and just did not feel like posting on my blog. But I want to make it up to you!


Here is the first layout I created for the February Scrapaganza's Scrappinista Scrapbook Club. Our SSC kit last month was Echo Park's Be Mine line. LOVED it! I'm not really a pink girl but the line of papers was sooo versatile, even though pink seemed a predominant color, it really didn't have to be, if you didn't want it to be.


So for my first layout I used primarily black, white and grey so that the pink was just an accent color. Included in the kit was a yard of wide pink ribbon and some Kaiser rub-ons. I used a strip punch from Martha Stewart and punched a paper "ribbon" and threaded the pink ribbon through that. embellishment stickers and a rub-on border complete the layout!


Thanks for stopping by!

Saturday, January 22, 2011

Tumble Dork - layout

Here is the last page for my Scrappinista kit for Scrapaganza. Never mind that missing photo... my printer wasn't printing right, and so I sent the photo to be printed locally only to find out their printer was on the fritz. I have the photo now but this picture was already taken by then. lol!

Anyway, on this one I used the maroon printed side of one of the kit papers. I really wanted to pull some of the blue color from the snow in the photos up into the red, so I used my stamp set and some Zing embossing powder in the color "Water" and embossed a few snowflakes. I like the striking effect. I also used some Imaginisce plastic snowflakes as well, which I really love.

If you are wondering what my son is doing, well he discovered by accident (at first) that if you put a chair on a hill facing uphill and try to sit in it, you will fall backwards. The first time surprised him. After that it became the coolest game around! So he did it over and over and of course mama-razzi had to take pictures of it. :)

Thanks for stopping by!

Friday, January 21, 2011

Play - layout

Here's the 2nd spread I created for the Scrappinista Scrapbook kit club at Scrapaganza.

I did pull and extra piece of printed paper that wasn't in the kit for this page. The polka dotted background. After laying it and the photos down, I got the idea to use the circle theme and continue that theme into the embellishments.

The background is stamped with Versamark Dazzle and the writing stamp that came with the stamp set. I also stamped a couple snowflakes and embossed with white embossing powder... one to fill one of the circle embellishments and one on the title circle.

The title is a Heidi Swap word that I had in my stash. The white pleated border is actually crepe paper from Dollar Tree. :)

Thanks for stopping by!

Thursday, January 20, 2011

A Taste of Vanderveer - layout

It's the time of the month for me to post my projects for Scrapaganza's Scrappinista Scrapbook kit club!

This month we got to use BoBunny's new winter line "Midnight Frost" and ooooh how yummy this line is! Beautiful blues, maroon and green. I just loved it! Our kit included 6 papers from the line, cardstock, stickers, ribbon and the coordinating stamps. We designers were asked to try to focus on ways to use our stamps so we did. I was way impressed with the ideas the other designers came up with!

On this layout I also used a technique I found in this month's issue of The Bug Magazine (which I am in! hee). It is to punch a strip of border with a border punch, then trim it down so that there's about 1/4 to 1/2 inch on the selvage edge. Snip the selvage edge every 3/4 inch or so, and then ease it around a curved edge op paper. The snips allow you to ease it around a broad curve, not tight small curves. If you've ever sewed, it's the same principle as easing a curve with fabric.

As for stamping, I used the snowflake stamps and a silver cats eye to stamp the green printed paper from the Winter Frost line.

The title block is a tag from the sheet of tags that you usually find with BoBunny's lines. It originally said "A Taste of Winter" but I used stamps to stamp the name of the park/conservatory we went to. I used pop dots to put it over the winter word and customized my title tag. ;)

Friday, December 10, 2010

Parisian Anthology #5

My final project for the Scrappinista Scrapbook Club kit this month is this little tag. I actually cut the tag with my cricut but I happened to size it the same size as the Sizzix Tim Holtz tag die since that's a hot item this season and I wanted non-cricuteers to have another option.

I used scrap printed papers that were left from my other projects with this kit. However, the Flair that I got from this line came in a bubble pack that I realized I could cut up to make treat packs with. I've already eaten up the rest of the M&Ms from the bag I bought for this tag. :(

The big thing I want to say though, is what happened when I made that red poinsettia. That is made from the chip banners that were in the chip embellishment box we got with the kit. I inked them up heavily with Aged Mahogany Distress ink... they were really nice and red. I thought that I'd add some Rock Candy stickles to them for a touch of sparkle. I did that, and went away so it could dry. When I came back, it looked like this... the ink had wicked away into crevices around the rock candy. What a neat effect! I love it!

Thanks for joining me for this exploration of the Parisian Anthology line from Pink Paisley!

Thursday, December 9, 2010

Parisian Anthology #4

My second to last project with my Parisian Anthology kit from Scrapaganza's Scrappinista club is a year in review mini book. The box held the chip embellishments for the Parisian Anthology line. When I surfed over to the Pink Paislee blog, I saw that one of the designers had used the box to hold a mini album, and I thought with the year coming to a close, that was a good idea to do an end of the year review in photos and journaling.
I took 6 #10 envelopes, and folded the flaps down narrower than usual, making sure that the sealed envelope would be narrow enough to fit within the box. That ended up being 3 1/2 inches wide. I sealed the envelopes with glue. Then I cut off one end to make them 7 1/4 inches long. I covered the envelopes on both sides with my left over printed papers and some cardstock. Inked them up with Distress inks in Forest Moss, Rusted Hinge and Wild Honey.  To attach the pages together, I did not want to use rings as those would be too bulky to fit in the box. Instead I took 1 1/2 inch strips of scrap cardstock and used border punches on both sides of the strips. Cut them down to 3 inches long approximately and used those as "hinges", glued on the ends of two facing pages. I also covered the outside binding with an outside hinge (cut on my cricut with Storybook) so that it would look more finished.
I printed out 33 photos that summed up our year, at wallet size. With the photos and remaining chip and artisan elements, I filled the mini album and decorated it. I wrapped the outside hinge with a thin ribbon that I could tie in some jeweled charms, and added a few extra ribbons for texture.  The little mini calendar months that mark each page are from the Tim Holtz pad of paper "Lost and Found". They were perfect for this project.
The envelope pockets hold a tag; the tags were cut on my cricut with Plantin, sized on my gypsy to be 3x7. Coordinating ribbon is stapled to the tags as pulls. The tags will have all my journaling about the year, one month per side of tag. I just haven't had time to write it all yet as I had to get this kit stuff done! LOL

This was a fun project! Not only to make it, but also going back through pictures and remembering everything. I've never done a "year in review" type project before and I think I will be adding it every year to give myself a chance to remember everything!  I highly recommend everyone doing a layout or mini book to remember your year too!

Thanks for stopping by!