Sunday, November 21, 2010

Scrappinista - Rum Ball Rumble

More from Scrapaganza's Scrappinista Scrapbook Club kit!

The Making Memories Sienne line has some browns in it too! One of the papers has some lovely butterflies in browner tones, and I pulled an extra paper that wasn't in the kit that also had browns, a handwriting script one. On the brown cardstock, these papers made a perfect background to pop a single layer of the brighter orange/red printed layer. By this time I was also getting a little tired of the monochromatic, so I chose pictures of my friend wearing a lovely blue dress, and did the title word "Rumble" in blue cardstock with my cricut and the Songbird cartridge. This was just enough color to liven up the monochromatic.

I used a Sizzix die for these 3D flowers, the store just started carrying them, though they are sold out already. :)  A great way to add dimension as well as use up scraps.

Thanks for looking!  (oh yeah, those rum balls were GOOD)

Saturday, November 20, 2010

Scrappinista - I Feel...

I love love love this glittered die-cut paper from the Making Memories Sienne line, that was in our Scrappinista Kit this month at Scrapaganza.  I always struggle with scrapping photos of me though, so I ended up keeping this page very simple to let the lovely paper show itself off.
However, I did take 12 inches of white double row rosette ribbon, and sprayed it with copper maya mist. That turned it a little too orangey for my taste so I then very lightly sprayed with a little brown glimmermist, which toned the copper down very nicely. I didn't like the way the double row rosette ribbon lay on my page, so I cut the ribbon down the length of it, and it worked for me better that way. I pinched the ribbon tight where I fastened it to the page, and covered that pinch (where I stapled it on!) with more baubles from the kit.

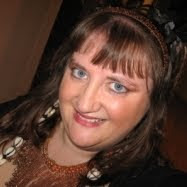
Yeah, that's me in one of my many belly dance costumes. :)
Thanks for looking!

Friday, November 19, 2010

Scrappinista - Davis 1978

One of the challenging things about a monochromatic line of papers is keeping it interesting as well as finding photos that "go" well with the color palette. In searching through my photo stash, I came across this family photo of my mom and I, and my stepfather and his kids. I'd forgotten all about this photo, as we hadn't been with them for over 20 years, but when I found it, I realized that it had discolored with age to exactly the right color scheme to go with these papers! lol
I cut out circles in two different sizes and "dahlia" folded them as flower type embellishments. I used more baubles from the kit to dress up my paper flowers, as well as some of the die-cut butterflies that are packaged and sold in this line. The packages have 60 butterflies in them! lol
I also used my Gypsy to create a scallop circle border by taking a scallop circle from Graphically Speaking and centering a circle within it. I cut the resulting scallop circle border in half and put the halves on either sides of the photo. Cutting this scallop in a natural off-white cardstock also helps break up the monotony of the color scheme I think.
I also used the alpha stickers that coordinate with this line. The line comes with two types of alphas, a more casual, larger font and this smaller glittered font. Since I'm all about the bling, I chose the glittered font. :)

Thanks for looking!

Thursday, November 18, 2010

Scrappinista Kit week!

I love working and designing for my local scrapbook store, Scrapaganza!  :)
Our store has a scrapbook kit club (Scrappinista Scrapbook Club) and this month's club kit features Making Memories Sienne line of papers. Scrumptious papers is all I can say!  I was not so thrilled with the stickers. They are very pretty and have wonderful journaling words and such, but they are not sticky once you remove them from the sheet. We have had to tell our customers to use additional adhesive to be sure their stickers stayed put. I had no trouble at all with the coordinating alphabet stickers I used.

So, I'm going to post everyday this week with each project from this kit!  My first layout was made using only supplies in the kit plus the title which was cut using my Cricut, and the Opposites Attract cartridge. That cartridge is really effective if used right. I recommend keeping the second (top) word short unless it's cut from paper that will stand out from the background as well as the bottom word. In this case, the patterned paper below the title would have overpowered the top word if it had extended out too far.
I love working with double-sided papers. Our Scrappinista kits always use double sided paper lines. Anyway, sometimes it's nice to find a way you can show off both sides of a paper. On this page I cut six 2 inch squares, folded the side corners in and snipped them in half. Then I lined them up as a border along the bottom of the layout.
The line and kit also came with a package of baubles, so I wrapped the main photo with ribbon and suspended a couple of the bauble gems from the ribbon.

Thanks for looking!

Tuesday, November 2, 2010

Batman Party!

My weekend was so BUSY! Not to mention my work schedule at Scrapaganza the two weeks prior! So I had to squeeze in planning my son's birthday party. I only had a few hours while working the crop at the store to whip out the paper decorations. Fortunately my son wanted a batman party and I had the Batman cricut cartridge!  Above is the banner made from the cartridge.
The masks, arm cuffs and a utility belt made from the cartridge.
My son wearing his batman gear and acting goofy! He turned 4 this year. :)

FYI... doing the mask "fit to page" on a 12x12 mat was too big even for an adult. I think I cut Kevin's mask at 7 inches... maybe a tad bigger, and I might have gotten by cutting it a little smaller because the eye holes were just a little wide. I believe I cut the cuffs at 6 inches? His belt is definitely cut at 3inches. He's a skinny boy so we used 6 links only.
I don't have the cricut cake machine and I stink at decorating cakes so I'm pretty proud that I did this. Kevin is allergic to wheat, dairy and eggs (as well as some other things) so I couldn't buy a decorated cake this year. Hence why I had to decorate myself. LOL.... however we did find a boxed cake mix that fit the bill with just a few alterations (Betty Crocker Gluten-free and replace the called for egg and butter). It tasted like a brownie! So, I may need to get me a cricut cake machine since I plan to make cakes and cupcakes now that I have that option! LOL

Thanks for looking!

Sunday, October 31, 2010

Fall minibook swap!

I participated in my first mini book swap this fall organized by Stuck On You Sketches blog. The theme was Fall which is what attracted me to the swap, as I adore fall colors!  For this book I used We R Memory Keepers Maple Grove line, just their printed papers and coordinating cardstock.
For embellishments, I used various ribbons, leaves, stamps and buttons. I also sewed on every page! One of the pages is acrylic, so I stamped on the page with Tim Holtz' new leaf stamp set, which I love love love.
But my most favorite embellishments throughout this book are the handmade buttons from Charlene's Button Box. Charlene is local to this area, her buttons are available at the scrapbook store I work at, Scrapaganza or on Charlene's etsy shop. She is a stellar button maker and I was thrilled with her fall buttons, they worked so well with this book! See detail below:
Her buttons really add something special to any project.
Charlene first began selling her buttons last year in the fall, and the "Family" button on the last page here is from one of the first batches of buttons we could buy.
And that's all there is! Thanks for stopping by to look, and thanks to my swap partner for being so patient waiting for this book!

Saturday, October 9, 2010

30 Days of Creativity - Day 19 Family art tray

I made this as a gift for grandma for the holidays this year. That's one down, several more to go. I've vowed to make some gifts this year and I am GOING to do it!  Anyway, this is my first such tray. I think I'd rather do one that has bigger spaces. This was the only one available at the time and it's nice, but it was very hard to work in such small spaces.

I used a couple sheets of paper from the Girls Paperie line that is the Scrappinista Scrapbook Club kit this month at Scrapaganza, but nearly all the embellishments are from my stash.