Sunday, March 6, 2011

Supply Organizer!

Have you ever gone to the store and bought some wonderful scrappy goodness only to get home and find out you already had it?
Well after doing that several times, I decided something had to be done! I'd actually had something in mind for an organzier for a long time. Then Scrapaganza, where I work got in a dozen of the Maya Road chipboard notebooks in just the right size for this project, so I created one and taught it as a class!

The paper I used is Pink Paislee Parisian Anthology, so that people could ink it up in the color scheme that best suited their style. We also used Maya Road rose ribbon, pins, Tim Holtz charms and Distress Inks, and I used my cricut gypsy and From My Kitchen cartridge to create sized to fit tabs for the book. We then put some paper between each tab so we could write down our stash.

This little book should fit nicely in my purse when I finally get it back from the store! lol

Saturday, March 5, 2011

Feb Scrappinista #5 - Use the scraps!

I am a HUGE fan of using up the scraps. When I get finished making layouts for the Scrappinista Scrapbook Club kit, I always try to find a little time to use up some of the leftovers somehow.
This kit had some fabulous stickers on the sticker sheet. It was very easy to use them on a few cards!

Here I used some of my leftover border rub-ons and ribbon. I just rubbed the rub-on right onto the ribbon, it transfers like a dream!

Instead of adding scraps to your stash, USE THEM UP!

Thanks for stopping by!

Friday, March 4, 2011

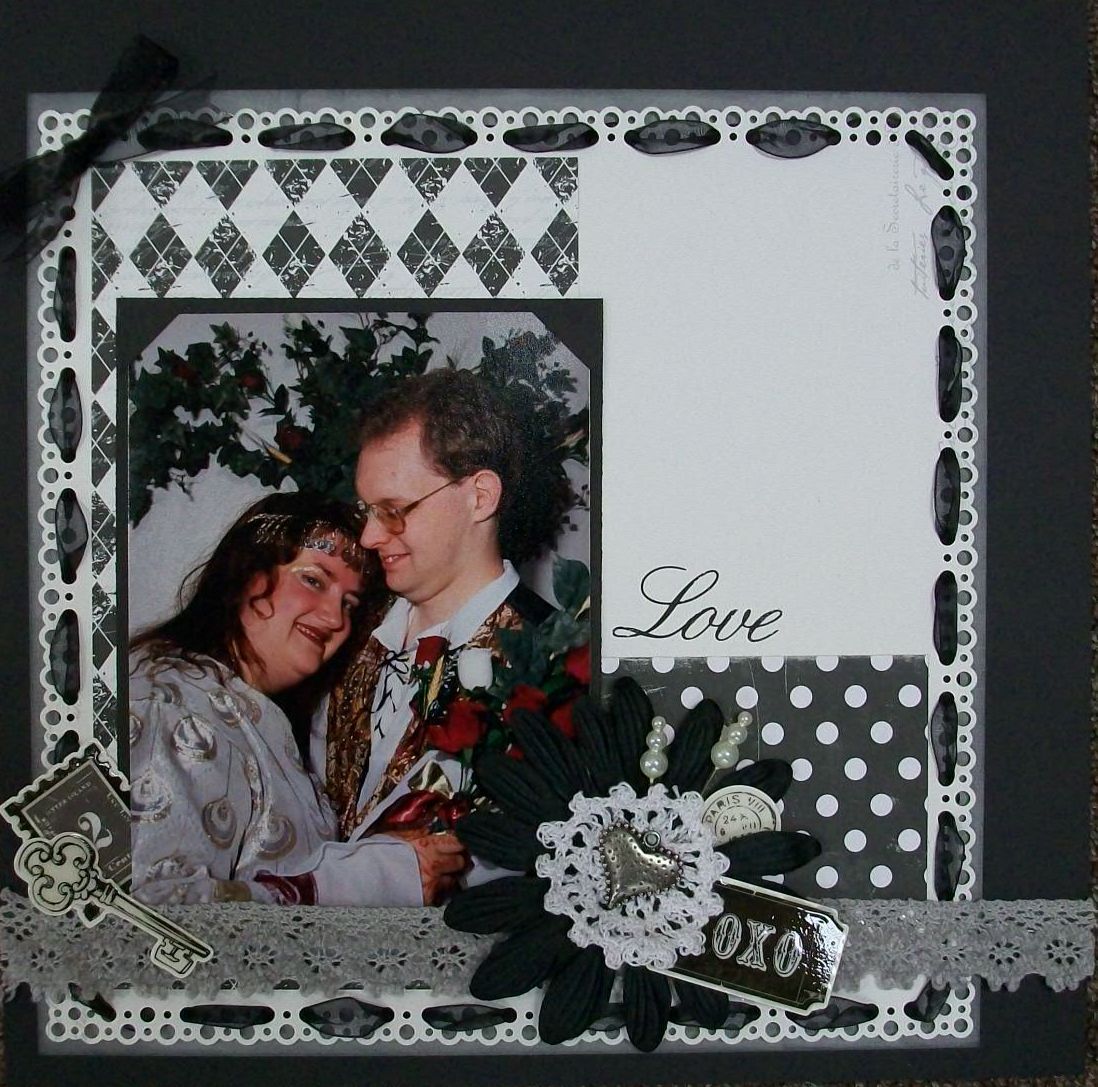
Feb Scrappinista #4 - Love

Not a whiff of pink anywhere! :)
This is still the same Scrappinista Scrapbook Club kit from Scrapaganza we got in February. I just didn't use any of the pink stuff. The white paper is actually a chunk that I cut out of the pink frame I used in my 1 year layout. I used my new Bubbles punch-around-the-page punch on it, then wove some black organza ribbon through the holes. Scraps left from the other pages were layered and then I added some stuff from my stash. There are 4 stickers from the kit that I covered with Glossy Accents and allowed to dry, which gives the stickers a whole new look. I really liked this page!

Thanks for stopping by!

Thursday, March 3, 2011

Feb Scrappinista #3 - Kevin

Yep, nothing wrong with pink in a boy layout!
More scrappy goodness from Scrapaganza's Scrappinista Scrapbook Club kit from February. I used the paper in the Echo Park Be Mine line that says "so in love with you" in the corner. Instant title! Some simple paper layering, a little bit of rub-ons under some Tim Holtz fragments, a few stickers and I'm done. ;)

Thanks for stopping by!

Wednesday, March 2, 2011

Feb Scrappinista #2 - 1 Year

That's me, at 1 year old! LOL... This is the second layout I created with the Scrapaganza Scrappinista Scrapbook Club kit, Echo Park's Be Mine line. In addition to the papers, I also used rub-ons from Kaiser and one of Charlene's Button Box buttons.  It's a simple layout but I love what the rub-ons do for it.

Thanks for stopping by!

Tuesday, March 1, 2011

Catching up! (Feb Scrappinista #1)

Wow friends! I just realized how long I've gone without posting. All I can say is that I had a lot of personal stuff going on in February and just did not feel like posting on my blog. But I want to make it up to you!


Here is the first layout I created for the February Scrapaganza's Scrappinista Scrapbook Club. Our SSC kit last month was Echo Park's Be Mine line. LOVED it! I'm not really a pink girl but the line of papers was sooo versatile, even though pink seemed a predominant color, it really didn't have to be, if you didn't want it to be.


So for my first layout I used primarily black, white and grey so that the pink was just an accent color. Included in the kit was a yard of wide pink ribbon and some Kaiser rub-ons. I used a strip punch from Martha Stewart and punched a paper "ribbon" and threaded the pink ribbon through that. embellishment stickers and a rub-on border complete the layout!


Thanks for stopping by!

Tuesday, February 15, 2011

Some new gypsy files

Some of my online friends have asked me to share some gypsy cut files they were particularly looking for, so here's my first batch of files for them and anyone else that might find these useful. :)
goddess figurines:  You will need the cartridges George and Gypsy Wanderings to cut these.

Download the .gypsy cut file here

goddess border: Same as above, you need George and Gypsy Wanderings to cut.

Download .gypsy cut file here

pentacles in different sizes: You need George and Indie Art to cut these. Everyone who registered their gypsy prior to Feb 28, 2011 should have Indie Art (for free) on their Gypsy!
Download .gypsy cut file here

pentacle border:  Same as above, George and Indie Art to cut.

Download .gypsy cut file here


Enjoy :)